
Install Ubuntu on the Milk-V Mars CM and CM Lite
The Milk-V Mars CM is a RISC-V based SBC.
Warning
The Milk-V Mars CM is not yet supported by official Ubuntu images.
Using the pre-installed server image
Download one of the supported images.
Flash the pre-installed server image to a microSD card (see Flash images to a microSD card) or a USB drive.
Insert the microSD card into the board or attach the USB drive.
Connect a USB UART adapter to the UART on the GPIO header (see UART console and Connect to a UART console)
Power on the board
When “Hit any key to stop autoboot” is displayed, press Enter
Reset the U-Boot environment with the following commands:
env default -f -a
env save
Power cycle the board
Wait for an output line confirming that cloud-init has finished running; this service is responsible for generating SSH keys, and creating the default user:
[ 35.682018] cloud-init[909]: Cloud-init v. 24.1.3-0ubuntu3 finished at Tue, 23 Apr 2024 07:44:59 +0000. Datasource DataSourceNoCloud [seed=/var/lib/cloud/seed/nocloud-net][dsmode=net]. Up 35.65 seconds
Login with the user ubuntu and the default password ubuntu; you will be asked to choose a new password
Using the live server image
The live installer image is used to install Ubuntu to an eMMC, USB, or NVMe drive. To boot the live image, U-Boot must be installed on the SPI flash.
Warning
The vendor U-Boot is not compatible with EBBR and cannot boot Ubuntu without manual changes.
Install U-Boot to the SPI flash
Flash the pre-installed server image to a microSD card (see Flash images to a microSD card) or to a USB drive.
Set the boot source to the microSD card (see Boot source selection)
Connect a USB UART adapter to the UART on the GPIO header (see UART console and Connect to a UART console)
Power on the board
When “Hit any key to stop autoboot” is displayed, press Enter
Enter the following commands to flash U-Boot to SPI:
sf probe
load mmc 1:1 $kernel_addr_r /usr/lib/u-boot/starfive_visionfive2/u-boot-spl.bin.normal.out
sf update $kernel_addr_r 0 $filesize
load mmc 1:1 $kernel_addr_r /usr/lib/u-boot/starfive_visionfive2/u-boot.itb
sf update $kernel_addr_r 0x100000 $filesize
Replace
mmc 1:1byusb 0:1when using a USB drive.Switch the board off
Set the boot source to the SPI flash (see Boot source selection)
Power on the board
When “Hit any key to stop autoboot” is displayed, press Enter
Enter the following commands to reset the U-Boot environment:
env default -f -a
env save
Switch the board off
Boot the live server image
Download one of the supported images.
Flash the live server image to a microSD card (see Flash images to a microSD card) or a USB drive.
Insert the microSD card into the board or attach the USB drive.
Ensure the boot source is SPI flash (see Boot source selection), not microSD card
Connect a USB UART adapter to the UART on the GPIO header (see UART console and Connect to a UART console)
Power on the board
If no prior operating system installation exists, U-Boot will start up GRUB on the microSD card. Go to step 9
If a prior operating system exists, press Enter when “Hit any key to stop autoboot” is displayed, and enter:
load mmc 1:1 $fdt_addr_r dtb/starfive/jh7110-starfive-visionfive-2-v1.3b.dtb
# for the 1.2a version of the board:
# load mmc 1:1 $fdt_addr_r dtb/starfive/jh7110-starfive-visionfive-2-v1.2a.dtb
load mmc 1:1 $kernel_addr_r EFI/boot/bootriscv64.efi
bootefi $kernel_addr_r $fdt_addr_r
From the GRUB menu, select “Try or Install Ubuntu Server”
Loading the installer takes some time. Once it is loaded, follow the Ubuntu Server installation tutorial
Once the installation is complete, reboot the board without removing the microSD card
Note
U-Boot does not allow the operating system to write UEFI variables.
You can do this manually using U-Boot’s eficonfig command.
NVMe support
For attaching an NVMe drive the Waveshare CM4-IO-BASE-A board can be used.
Warning
On the Raspberry Pi Compute Module 5 IO Board NVMe drives do not work.
The Milk-V Mars CM does not drive the line PCIE_PWR_EN to enable power to the m.2 connector.
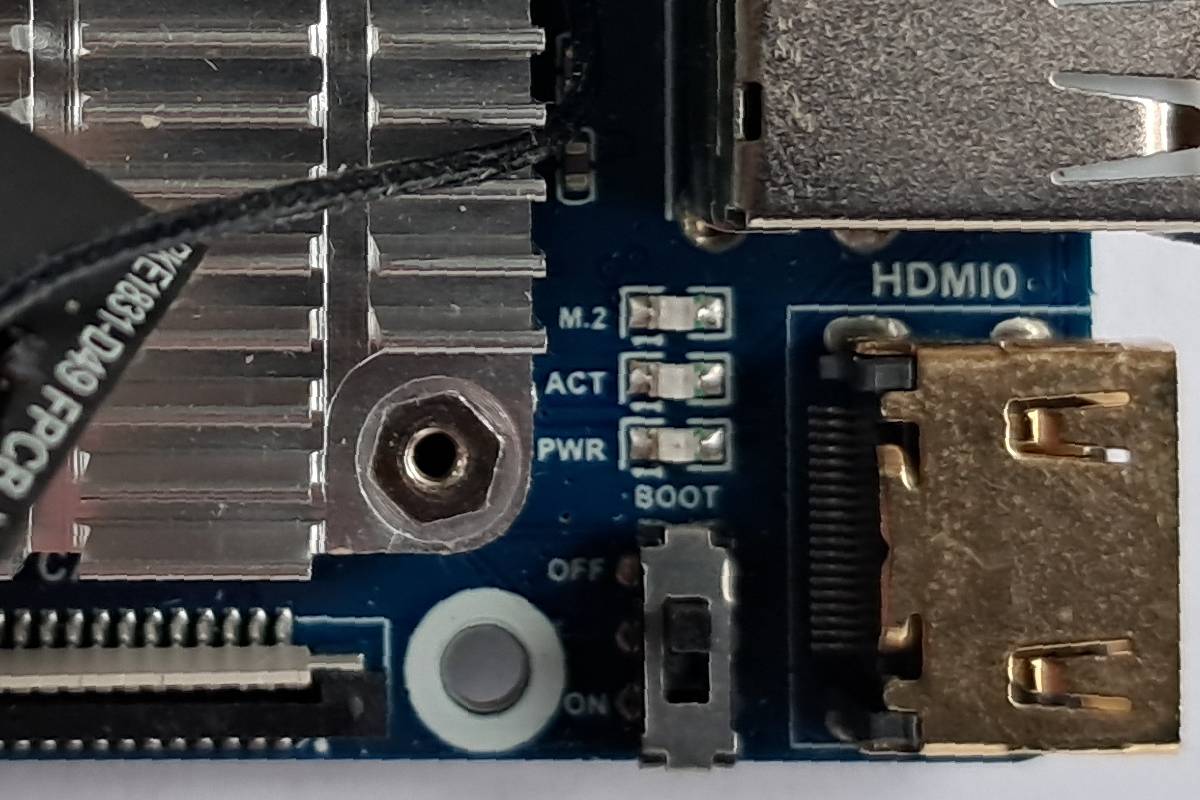
Boot source selection
The Milk-V Mars CM board can boot firmware from SPI flash or UART. The boot source is selected via the nRPIBOOT line. When connected to ground, booting from UART is selected.
On the Waveshare CM4-IO-BASE-A board a switch labeled “BOOT” is connected to the nRPIBOOT line. Switch it to to “OFF” to boot from SPI flash and to “ON” to boot from UART.
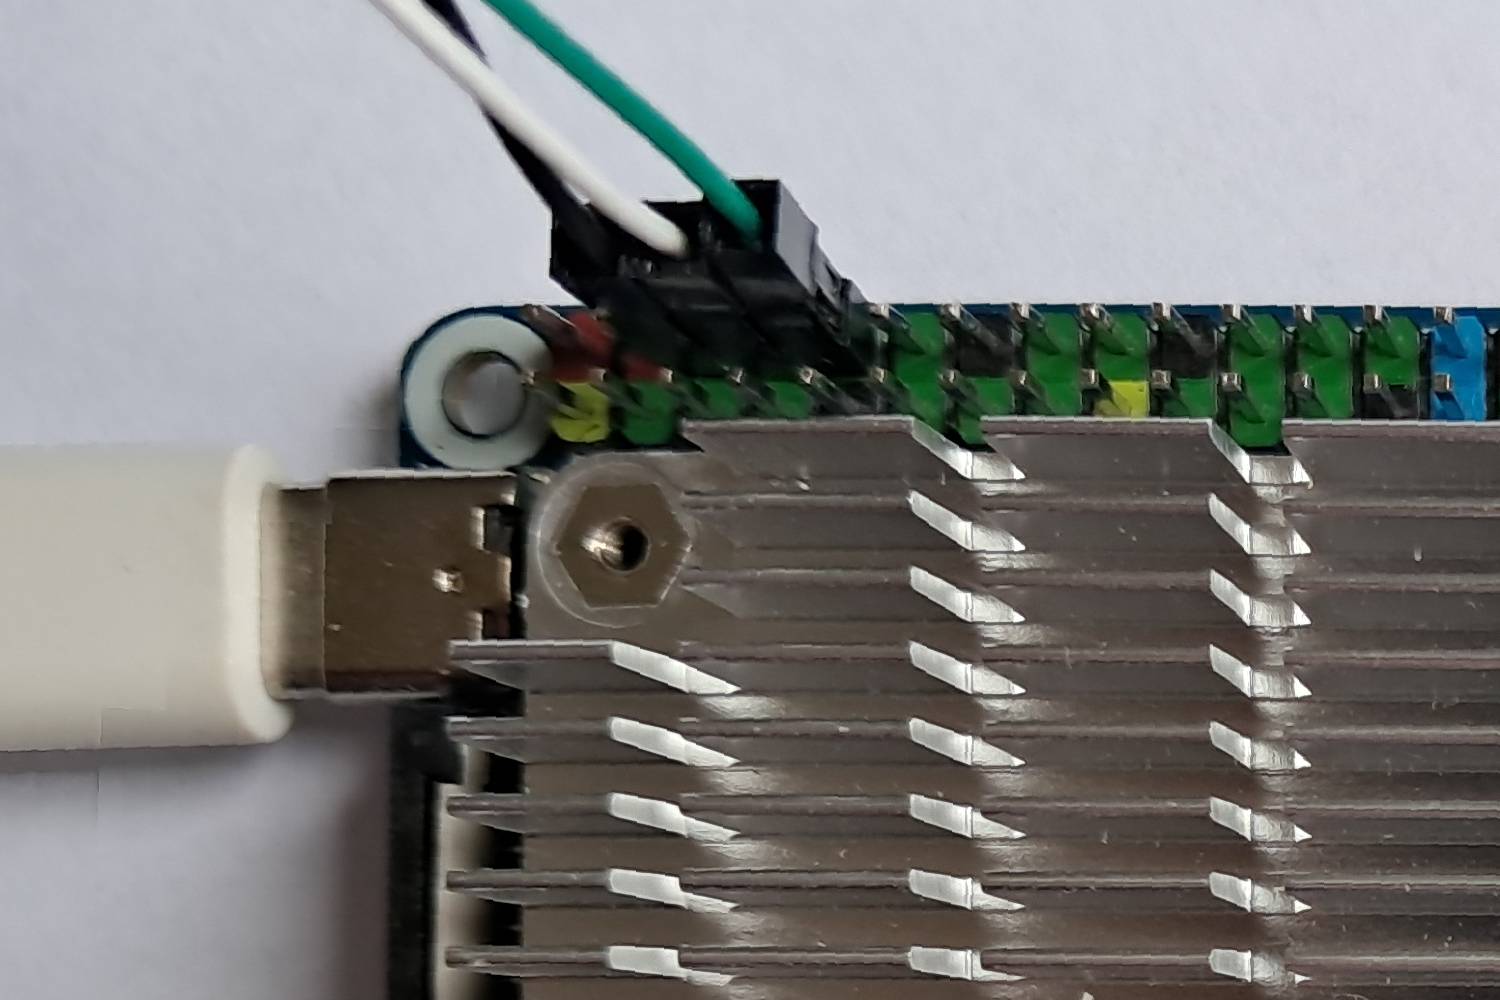
UART console
The UART is available on the Waveshare CM4-IO-BASE-A board via the GPIO connector. Assuming the typical coloring of USB to TTL serial adapters the following connections have to be made:
Board |
Adapter |
|---|---|
GND, pin 6 |
GND, black |
TX, pin 8 |
RX, white |
RX, pin 10 |
TX, green |
Do not connect the red 3.3 V wire.
Connect with the following settings (see Connect to a UART console):
115200 baud
8 data bits
no parity
1 stop bit
no flow control
Limitations
The on-board GPU is not supported
PCIe support is incomplete: an NVMe drive can be used, but Wi-Fi cards and external GPUs don’t work
While the 3 USB 3.0 ports are working, the USB 2.0 port is not supported by the 6.8 kernel